The Art of Coffee
French Press
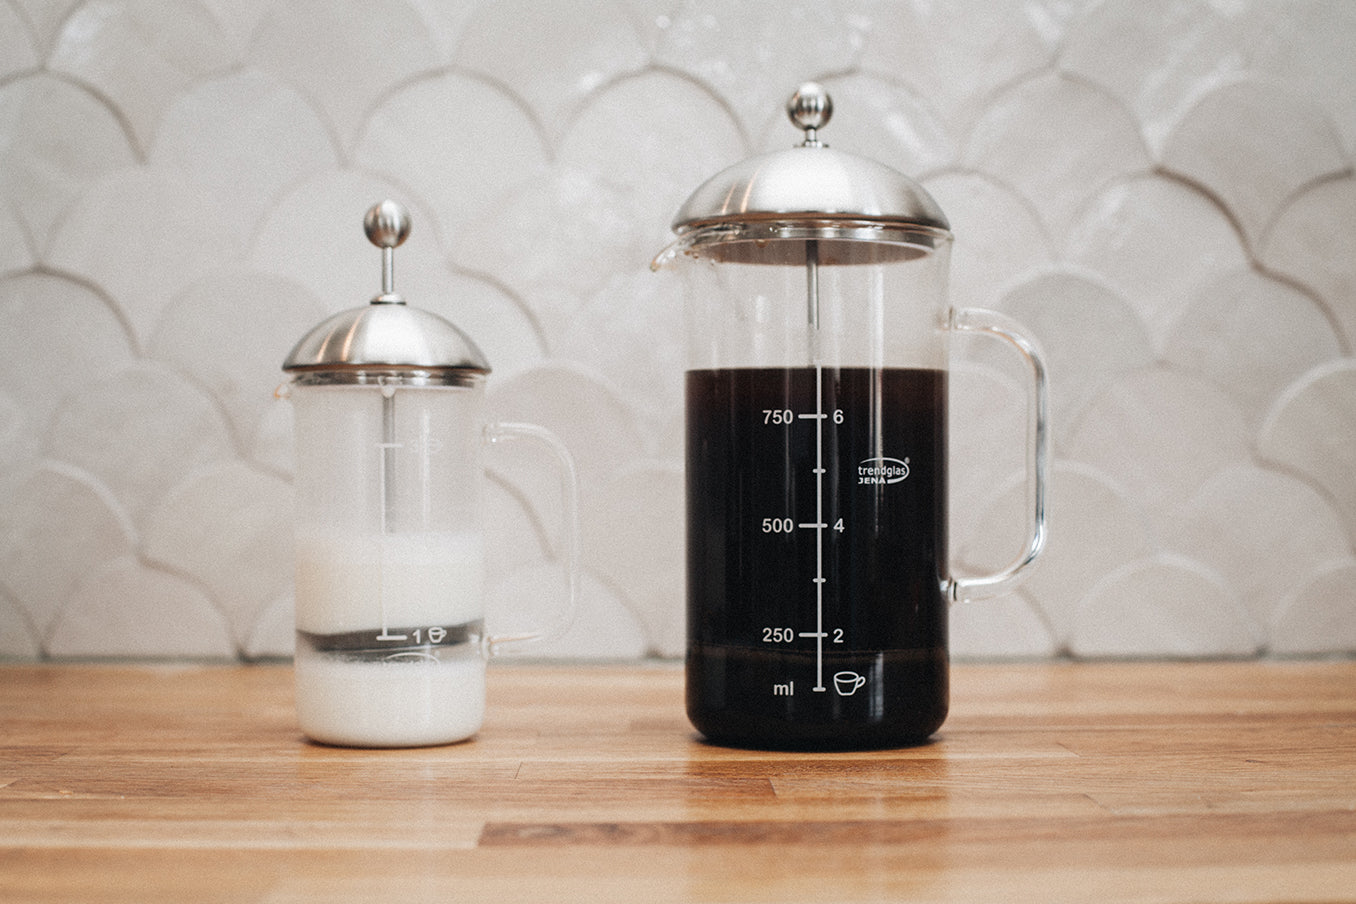
It is believed that the French press was invented in the 19th century. As the name suggests, it was in France. However, it only became known in 1974 when a Danish manufacturer brought it onto the market in its current form. The French press is easy to use and doesn't produce any waste. The coffee from the French press has a lot of body because the water doesn't just run through the coffee, but is mixed with it. It tastes strong and full-bodied.
Here’s how to brew coffee in a French press:
Grinding level: medium-coarse
Our small French Press makes 350 ml of coffee, about 3 cups
Our large French Press makes 1 liter of coffee, or about 8 cups
Small French Press: approx. 23 g (2.5 – 3 tsp) coffee
Large French Press: approx. 65 g (8 tsp) coffee
Basically you can say: 16 g (2 tsp) per 250 ml water
Tip: Weigh it once and then always use the same container as a guide, for example the same espresso cup.
2. Heat water to 90 – 96 °C and pour over the coffee powder.
For the perfect temperature, boil the water and let it stand for about a minute. If the water is too hot, the coffee can release undesirable bitter substances.
3. Stir and let it brew for 4 minutes.
Do not put the lid on yet, as this will push the coffee down. Keep an eye on the time: if the coffee is brewed for too short a time, it will taste watery; if it is brewed for too long, it will taste bitter.
4. Press the sieve plunger down slowly and evenly.
Pour the coffee directly or pour it into a thermos flask, otherwise it will continue to brew and become bitter.
The French press is a real all-rounder and can do more than just brew coffee. It can also be used to froth milk or to make your own plant-based milk.
Frothing milk with the French Press:
- Heat milk on the stove or in the microwave to approx. 60 °C
- Pour into a French press and move the sieve up and down until the milk becomes foamy.
Sift plant milk:
- Soak nuts or oats overnight and then mix
- Pour liquid into the French press. The milk is filtered by pressing down the sieve plunger.
hand filter
The permanent filter is used to prepare filter coffee. Classic filter coffee is prepared with a paper filter, which produces a lot of waste. With a reusable stainless steel filter, you can avoid this and brew the best filter coffee without having to buy a filter coffee machine. The pour over method brews a milder coffee.
In order to weigh the amount, you first have to decide how much coffee you want.
Let's assume that we want to fill one of our KeepCups.
Grinding level: medium-coarse
KeepCup (or other cup) 300 ml water 18 g (about 2 tsp) coffee
Basically you can say: 6 g of coffee per 100 ml of water.
2. Heat water to 90 – 96 °C
For the perfect water temperature: Boil the water and let it stand for about 1 minute. If the water is too hot, the coffee can release undesirable bitter substances.
3. Moisten the coffee powder and let it rest for 30 secondsPour some water in a circular motion and mix the water with the coffee. There should be about twice as much water as coffee in the filter. Let the whole thing rest for about 30 seconds. This causes the coffee to swell and the extraction to work better.
4. Pour the remaining water in a circular motion and stir.
In the best case, the entire amount of water, including humidification, runs through the powder in about 2:30 – 3:00 minutes.
coffee grounds
There are lots of things you can do with coffee grounds and it's definitely worth keeping them. However, they can easily get moldy and so they need to be stored correctly. After making coffee, spread the coffee grounds out on a plate or tray and dry thoroughly for a few hours. We've selected 5 things for you that will motivate you to never throw away your coffee grounds again:
Fertilize . Simply sprinkle some coffee grounds on the soil once a week. For houseplants, mix a small amount of coffee grounds with some soil and replace the top layer of soil in the pot with it.The mixture can also be supplemented with shea butter, jojoba oil and cocoa butter.


1 comment
AUf dem Kaffeesatz kann man wunderbar Speise-Pilze wachsen lassen. gibt man dann noch Lignin dazu, z.B: in Holzabfällen oder Schilf wird das Ergebnis noch besser. Wenn keine Pilze mehr wachsen, ist der kOmpost immer noch eine geeignete “Endlagerstätte”
Thomas
Leave a comment
This site is protected by hCaptcha and the hCaptcha Privacy Policy and Terms of Service apply.